Steps
Open Publish video and choose the account
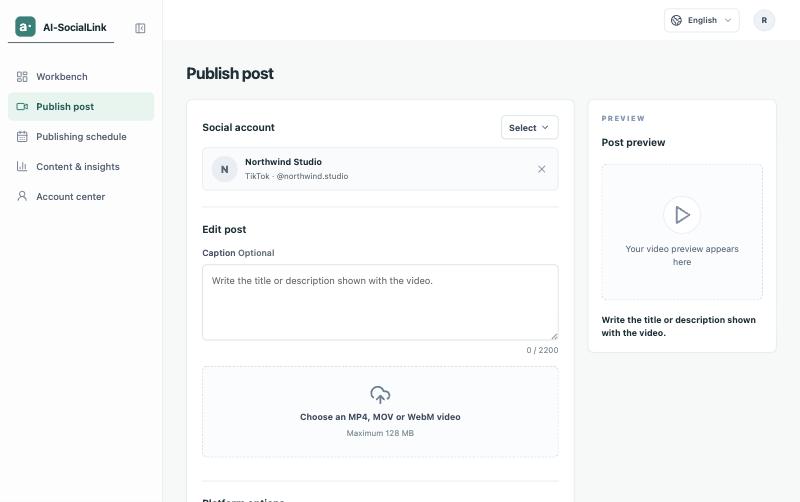
Open Publish video in the sidebar. Under Social account, select Select, pick the TikTok account, and confirm.
Add the video and caption
Choose an MP4, MOV or WebM file. The maximum size is shown on the page (128 MB unless the service is configured otherwise). The caption is optional and can be up to 2,200 characters. The preview shows your video and caption, and for direct posts you can pick a frame from the video as the cover.
Choose the publishing method
Direct post publishes to the selected account. Send to TikTok inbox delivers the video as a draft that you finish editing and publish inside TikTok.
Set visibility, interactions and disclosure
For direct posts, choose a visibility option (the choices come from the account), decide whether to allow comments, Duet and Stitch (options the account does not allow are disabled), and use Content disclosure if the video promotes a brand, product or service: your own business, or branded content for a third party. Branded content needs Everyone or Friends visibility.
Confirm your rights and TikTok’s terms
Tick that you have the rights to the video and any music in it, and the TikTok consent box, which refers to TikTok’s Music Usage Confirmation (and the Branded Content Policy when branded content is selected). Both are required before sending.
Send now or schedule
Under Timing, choose Send now or Schedule. When scheduling, pick the date and time; it uses your browser’s time zone and must be between one minute and 90 days from now. Submit the post.
Check the result
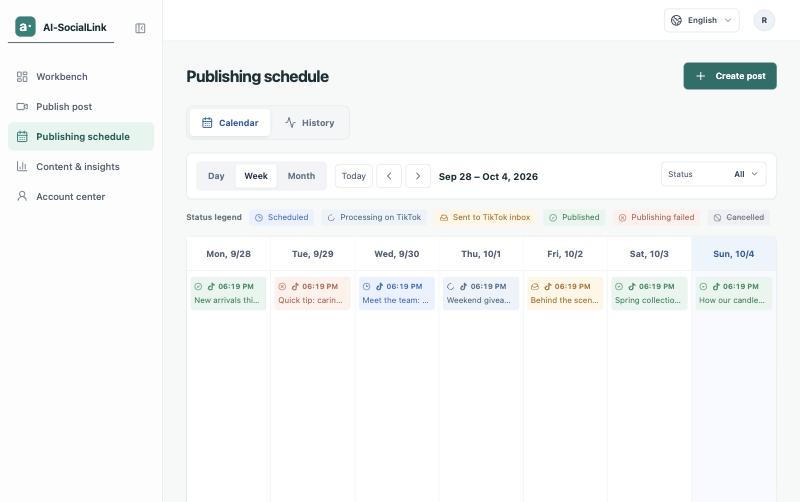
Open Publishing schedule to see planned posts on the day, week or month views, and History for the status of each post. A scheduled post can be cancelled with Cancel schedule until sending begins. If the service was unavailable at the chosen time, the post is marked failed and nothing is sent, so schedule it again.